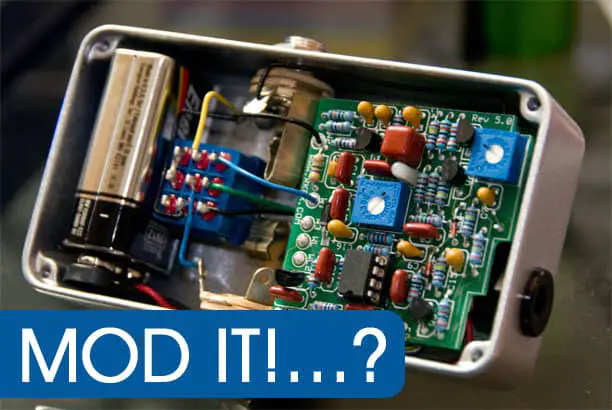
Pedal modding can be a fun and rewarding way to customize your tone and create new sounds, and represents the first step on the path of becoming an actual pedal manufacturer!
Pedal Modding = Learning
For as long as there have been musical instruments, there have been modders—users who want to improve or enhance a device to make it meet their specific needs or performance requirements.
The development of electronic musical effect pedals in the 1960s set off a wave of inventions that has really never ceased, thanks in great part to these tinkerers. Today, hundreds of manufacturers, boutique pedal makers, and hobbyists across the globe produce variations on effects like distortion, overdrive, fuzz, delay, chorus, wah-wah and more. Many of these effect makers got their start by modifying seminal electronic designs or building recreations of those original groundbreaking circuits, usually with some improvements or new features added in.
Where to Start: DIY Kits
If you’ve ever been struck with a similar desire to modify your effect pedals, you’ve probably wondered where to start.
If you have zero experience in this branch of, well, engineering, before you get too creative you may want to take up some straight assembly projects to help you understand the basics and develop your soldering skills (see below for a helpful video).
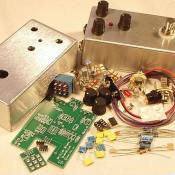
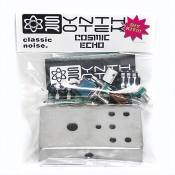
Mod Kits DIY provides affordable pedal kits for all types of basic guitar effects. Each comes with instructions and features varying levels of difficulty ranked from one to five. Build Your Own Clone offers a similar collection (some projects are customizable) and slightly more involved circuits. It also sells a Beginner’s Tool Kit, including Solder Station and Digital Multimeter, for just about $45!
Here are a few popular entry-level to mid-difficulty DIY kits:
GOOGLE IT!
Once you have the basics down and are ready to experiment with modding, you can search for instructions on how to mod most common pedals online—simply type the name of a pedal plus the word “mods” in a search engine or on YouTube.
But before you start looking, it’s good to think about your goals with modifying a pedal, as well as the tools, skills, parts and other things you’ll need for the job.
In this article, we’ll discuss:
• Why you might want to modify your gear
• What tools you’ll need
• Which basic electronic components you’ll use
• Where to find supplies
• What resources are available to help you with your projects
Why Mod?
Some of the main reasons people choose to modify pedals include:
To Change the Tone
Perhaps the most common reason to mod a pedal is to improve its sound. Guitarists have been doing this to their gear for ages, swapping out pickups, installing alternate hardware options and even tinkering with “under the hood” electronics. For instance, some guitarists like to replace their guitar’s stock tone control capacitor with Sprague Orange Drop capacitors to help them attain the “magic” of vintage gear. You can do the same thing with your pedals, swapping out capacitors and resistors to change the EQ, switching integrated circuits (ICs) and diodes to change the performance of distortion pedals and much more.
To Improve Components
Some older pedals have jacks, pots and switches that can’t stand up to the rigors of daily use. You can make your pedals more roadworthy by swapping these out for higher-quality components.
To Reduce Noise Levels
Hiss is a major problem with compressors, wahs, dirt boxes and many other types of pedals. You may be able to lower the noise floor by upgrading the unit’s stock ICs with higher-spec components.
To Add New Features
Install true-bypass switching to old pedals, replace finger-operated toggle switches with foot switches…. These and many other features can be installed on your existing pedals.
To Enhance Appearance
Tired of looking at the same old LEDs on your pedals? Replace them with LEDs of a different color.
—
—
Tools Required
Fortunately, modifying pedals requires only a few basic and inexpensive tools and supplies. For most jobs you’ll need the following:
Soldering Iron
A basic low-wattage (20–40-watt) soldering iron will do the trick. You can use a more powerful 60-watt iron, but it will be hotter and you’ll have to be careful that you don’t overheat components. Consider buying a soldering iron with an integrated stand to keep the iron’s hot tip from burning you or your gear when it’s not in use.
Solder
Buy the kind with flux or rosin core. Avoid acid-core solder, which is designed for soldering steel and other metals.
Desoldering Braid
This is useful for removing components, as it sucks up the solder and allows you to easily pull the part free from the board.
Basic Tools
Wire cutters, needle-nose pliers and screwdrivers are essential items. Remember that while a standard Phillips-head screwdriver can be used to open up a pedal, inside you may find tiny screws that require smaller driver heads with different slotting arrangements. Consider investing in a precision screwdriver set with interchangeable heads, such as this one. It includes everything you need to open a pedal and deal with any other little screws you find inside. It even includes tweezers and a tip extender. Better still, you’ll find uses for it with everything from your gear to your computer to your eyeglasses.
Typical Components
There are numerous components in most effect pedals. These are some of the more common devices you’ll be dealing with. The descriptions are brief and intended only to explain each part’s purpose within an electrical circuit. For a fuller description, watch the videos below and check out the resources section listed toward the end of this article.
Transistors
Transistors are used to amplify electronic signals and switch electrical power using no moving parts. They are semiconductors, which means they are halfway between being conductors and insulators, and they’re used to make a large amount of current flow by using only a small signal current. As you can imagine, they play a critical role in distortion pedals by boosting the input signal.
Check out this video for a detailed explanation of how transistors work.
Capacitors
Capacitors hold an electrical charge. They consist of two chambers separated by an insulator known as a dielectric. Positive charges collect in one chamber and negative in the other. When the amount of energy stored exceeds a threshold, the capacitor discharges. Capacitors can also be made to discharge when used in association with switching transistors and a clock device. This is how bucket-bridge devices (BBDs) found in electronic analogy delay pedals work. The BBD contains a number of tiny capacitors in series. As the sampled voltage from an input enters the chip, it’s held in the first capacitor. Switching transistors tell the capacitors when to discharge and pass their voltage down to the next capacitor in line. A clock is used in association with the transistors to establish the rate at which the circuit operates. In addition, capacitors are often used with power supplies to smooth the output and prevent spikes that can occur from alternating current (AC). Capacitors can’t pass direct current (DC) and are often used to separate the AC and DC components of a signal.
Resistors
True to its name, a resistor limits the flow of electricity. These devices are typically used to restrict the amount of current passed to another component. Resistors comes in a variety of values and are chosen according to the requirements of the job at hand. Potentiometers, such as those used for volume and tone control, are a form of variable resistor. These devices can also be used in simple delay circuits to slow down the flow of electricity into a capacitor, thereby creating a time delay in the circuit.
Diodes
Diodes allow current to flow in one direction and prevent it from passing in the opposite. They come in a variety of types, including rectifying diodes, which are used to turn AC into DC, and light-emitting diodes, or LEDs.
Op Amps
Op amps—or operational amps—are small integrated circuits designed to amplify the voltage that’s put into them. You find them throughout a range of audio equipment—from hi-fi components to amplifiers and pedals. Op amps are sometimes used in place of transistors in a distortion pedal to boost the input signal.
You’ll notice that some op amps are soldered directly to the circuit board. If you want to try out a number of different op amps to determine their effect on tone, it will be helpful to install a socket that will let you easily swap them without having to solder and desolder them every time. For example, Monte Allums Custom Guitar Products makes the Boss Dual Stack Chip Adapter Mod Kit, which replaces the stock single inline pin (SIP) op amp in Boss, Ibanez and other pedals with two double inline pin (DIP) chip sockets. That’s right—two! That means you can insert up to two DIP op amps into your distortion pedal’s circuit, thereby doubling the signal’s boost before it reaches the clipping stage. You can purchase the Chip Adapter Mod Kit here. You can also learn more about the kit and hear a Boss DS-1 Distortion with a range of different op amps in this article from our friends at Reverb.com.
To learn more about some of these devices, check out this “Simple Guide to Electronic Components” video.
How to Solder & Desolder
Soldering irons are simple devices, but if you’ve never worked with one, you might not know the proper technique for using it.
The video below demonstrates basic soldering techniques and includes tips on how to make a proper bond.
Of course, if you’re modding pedals, you’ll also need to know how to desolder existing components in order to replace them with new components. This video shows how to properly desolder.
Parts Resources
To get started with your first modding project, you’ll need not only a pedal but also various electronic components, depending on the type of mod you want to perform.
Pedals
If you have no experience modifying pedals, you might be hesitant to start tearing apart a favorite stompbox and swapping out components.
Instead, find a cheap but functional Boss or Ibanez pedal you can start with. They are among the most common brands of pedals, and you may already have one that you can scavenge for a project. The pedal should work—there’s no point modifying one that’s not operating because you won’t be able to tell if your effort was successful. Working with an inexpensive pedal is also a good way to build skills and confidence for tackling bigger projects.
In addition, stick to analog pedals. They’re easier to figure out than digital stompboxes, and all of the components can be swapped out.
Components
Digikey, Mouser and Jameco are great resources for modders. You can find everything you need—from transistors and resistors to capacitors and diodes—as well as control knobs, LEDs, and much more. Both sites make it easy to search for the items you need and in the specifications and tolerances required for the jobs. Also check out AllElectronics.com and Frys, the latter of which has stores in nine states.
Instruction Resources
Books
If you’re serious about modding pedals, you can’t do better than Brian Wampler’s How to Modify Guitar Pedals: A Complete How-to Package for the Electronics Newbie on How to Modify Guitar and Bass Effects Pedals. Brian, who is CEO of Wampler Pedals, shows how to modify and custom tailor each of your effects pedals to your needs and tastes. It includes walk-throughs of various circuits with complete details on how to modify over 80 different effect pedals. He also explains how to read and understand schematics, install pots and switches to control mods, and much more.
If the Electro-Harmonix Big Muff Pi is among your favorite pedals, check out Guitar FX Mods: Big Muff Pi, by Jack Orman. It offers an in-depth look at the circuit inside one of the classic effects pedals of all time, along with suggested modifications. It’s available as an Amazon Kindle book, which can be read on any computer or handheld device with the free Kindle app.
If you want to learn more about electronics, there are a number of useful books to help you.
Two of the best guides to electronics are Getting Started in Electronics, by Forrest M. Mims III and Make: Electronics: Learning Through Discovery (2nd Edition), by Charles Platt.
Getting Started in Electronics is a complete electronics course that includes circuit assembly tips and 100 electronic circuits and projects you can build and test.
Platt’s Make: Electronics is aided by a number of handy component kits that you can purchase separately. Each includes all the parts you need to build the projects outlined in the book.
Lastly, Handmade Electronic Music: The Art of Hardware Hacking, by Nicolas Collins will give you some basic pointers and teach you how to cannibalize electronic circuits from radios and toys to create new gizmos.
Online Resources
Finally, a simple online search will turn up plenty of videos and articles on pedal modding, including instructions on how to mod specific pedals. Search through forums like diystompboxes.com and thegearpage.net, where you’ll find plenty of great information. In addition, check out Ben Fulton’s article on “4 Pedal Mods for the Masses,” which walks you through progressively challenging mods.
We’ve picked a few videos from YouTube to get you started.
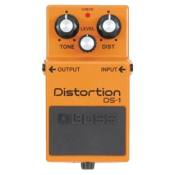
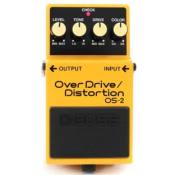
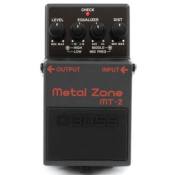
Scottish luthier CSGuitars has some great instructional videos on how to mod a number of celebrated pedals, complete with parts lists and other useful data. Check out his videos for Boss DS-1 mods, Boss OS-2 Overdrive/Distortion mods and the Boss MT-2 Metal Zone Diezel mod.
There are several videos out there about how to mod an Ibanez TS-9 Tube Screamer to perform like a TS-808 Tube Screamer. Zach Broyles from Mythos Pedals shows how easy it is in this great video. The difference is down to two resistors, which shows what a difference a small component change can make.
Here’s a cheap and easy way to add true bypass to a Cry Baby wah:
Those should get you started on your first mod. Best of luck!




1 comment
sam says:
Nov 25, 2020
Hi, have been looking for SCHÉMATIC MAP FOR A BLUES POWER KINGTONE GUITAR PÉDAL .
Thanks